
Do you have an idea for a game that could address a learning challenge, but you're not sure how to make it a reality?
Believe it or not, you don't need advanced coding skills to build an engaging game that can benefit learners — just follow these 7 steps to create your first digital game for education!
Step 1: Define an action-oriented learning objective
Think about what learners should be able to DO as a result of playing this game. Focus on actions, not just knowledge.
 Consider writing your learning objective with one of the following action verbs: create, build, experiment, explore, interact, navigate, solve, utilize, collaborate, strategize, or adapt.


Which of the following would be a good learning objective for a game about coral reef ecosystems?
A. Players will be able to describe the biodiversity and interdependence of organisms in a coral reef.
B. Players will manipulate living and non-living environmental factors to build and maintain a healthy coral reef.
C. Players will understand the importance of conservation for coral reefs and other marine ecosystems.
Quiz
Select the best learning objective for this game.
Step 2: Decide what kind of game best addresses the learning objective

Many games built for education feature arcade-style play, such as shooting the correct solution to a math problem. While these types of games can be useful for drilling basic facts, they don't foster higher-level thinking or have much real-world relevance.
Worse yet, savvy learners quickly see through this attempt to make learning fun, which is why this approach is often ridiculed as "edutainment" or even "chocolate-covered broccoli."

Instead of putting a gamified veneer on drill-and-practice problems, think about which game genre best represents the real-life contexts where learners can apply what they're learning.

For example, role-playing games (RPGs) allow learners to walk in the virtual footsteps of historical figures, learning about their worlds and solving problems from their perspectives.

Simulations give learners the opportunity to solve real-world problems from the perspective of characters as diverse as scientists, policy makers, and language learners.

Strategy games can be excellent for fostering critical thinking, problem solving, and collaboration among learners.
Step 3: Determine the game objective and narrative
You know your learning objective, but what about your game objective? While both are important, a game without a game objective is, well...not a game.
Your game objective tells learners what they have to do to win the game, and it's a big part of what makes the game fun!

Some common game objectives are:
Defeat the dragon
Rescue the fallen soldier
Escape the zombie apocalypse
Solve the mystery
Break the curse
Your game objective will form the base of your narrative, which is the story that players follow throughout the game.
The narrative should be engaging and should make sense for your learning objective.
Subscribe for more quick bites of learning delivered to your inbox.
Unsubscribe anytime. No spam. 🙂
Step 4: Design your game
In professional game design, this stage is known as pre-production, and it's a critical phase.
You probably know the old saying "measure twice, cut once." In the design phase, you want to create a thorough plan for your game to avoid wasting time and resources when actually building it.
Focus on the following in the design phase:

Determine the scope of your game. How complex will it be? Will it have multiple levels? (Hint: keep it simple!)

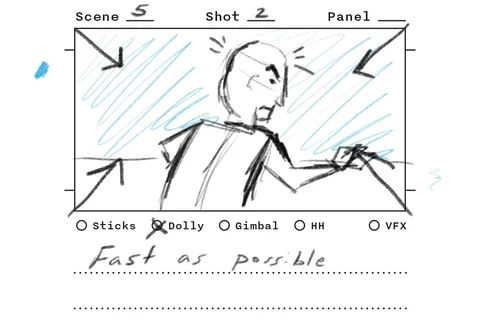
Draw a rough sketch, often referred to as a "napkin sketch," of your game's main visual elements.

Create an outline of the main events in your game narrative. If players will be making choices that influence the trajectory of the story, use an organizational tool to build the branching scenarios.

Once you know your storyline and visual elements, lay out each scene onto a storyboard.
Did you know?
Step 5: Choose a game engine
No coding skills? No problem!
While advanced technical knowledge and high-level coding skills are certainly useful, they are no longer necessary for creating basic games.
In fact, there are a number of low-code and even no-code game design engines that can help you create your first digital game for education!
Which game engine works best for you will depend on factors such as cost, level of technical expertise needed, and the type of game you want to create.
Did you know?
Step 6: Create or gather your assets
Think about everything you experience when you play a game: the music and sound effects, the environment, the characters, the objects, the points and badges, etc.
Collectively, these are known as assets, and you will need to consider how to create or obtain them for your game.

Some game engines come with an asset library or offer asset add-on packs.
If you're experienced with drawing or animation software, you may be able to create your own assets.

Otherwise, just search for what you're looking for! Lots of talented creators have already done the work for you, and some of them even offer their work for free! Just be sure to abide by any posted restrictions on use, and give credit to the creators.
Step 7: Build your game
Finally, it's time to bring your game to life!

But wait! Creating a polished game that engages learners and achieves its objectives is no easy task, even with thorough planning.
Instead of spending countless hours developing a game that may or may not live up to your hopes, break down the development process into cycles of development, testing, and improvement.

Build your prototype. The prototype should be a very basic, working version of your game.
It doesn't need to include your final audio and visual elements, but it should function in the way that the finished game will, allowing you to test and refine what does and doesn't work with real players.
Test your game with learners that represent your target audience. What do they find engaging? What do they not understand? What works well, and what doesn't?
Make revisions to your game based on learners' feedback. You may need to repeat the testing and revision process several times before your game is ready for the final build.

Once you're satisfied with all elements of your gameplay, it's time to build out the final product with audio and visual elements that will enhance learners' experience with the game!
Take Action
Your feedback matters to us.
This Byte helped me better understand the topic.