
Jacob just came home from his first summer volunteering at a sleep-away camp. Every night the camp director would take out her guitar and play a few songs.

The way the guitar united the staff and campers really inspired Jacob to learn how to play it. He aims to learn the basic chords needed to play the songs at next summer's campfire.
If you're like Jacob and want to start strumming your first chords, follow these 4 easy steps to get comfortable with the instrument.
Step 1: The Basics
Strong musicians know their instrument well. This begins with knowing the parts of the guitar:
Body — where sound is amplified.
Strings — where sound is created. You'll strum strings above the tone hole and press on strings on the neck.
Tone hole — where sound resonates out.
Frets — where you'll place fingers to make notes and chords. Each Fret is numbered starting with 1 (closest to the head).
Fret rods — separate each fret along the neck.
Neck — houses the frets and fret rods.
Tuning pegs — you'll twist these to make sure your strings are in tune and ready to play.
Head = houses the tuning pegs.
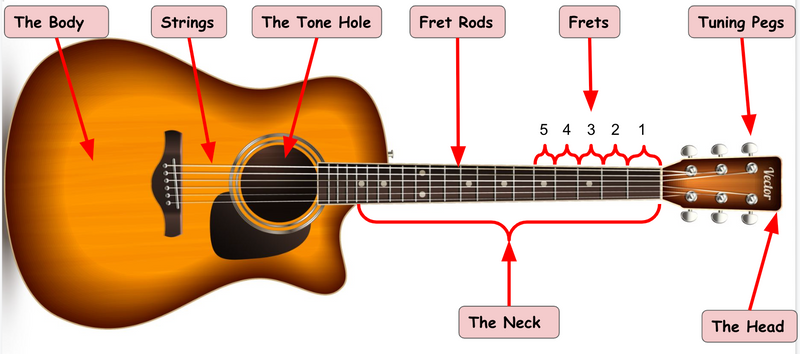
Image of Guitar by macrovector on Freepik. Labels added by Rumie Author.
There are 3 main ways to hold the guitar:
Camp-Fire Style
Musician sits
Head of guitar is slightly above the tone hole
Typically used by non-classical guitar players (most common)
 Photo by Alex Suprun on Unsplash
Classical Style
Musician sits
Left leg is propped up (usually a stand or wooden block)
Head of guitar is parallel with your head
Typically used by classical guitar players
 Photo by Ilse Orsel on Unsplash
Standing
Musician stands
Uses a strap that connects to the guitar's body
 Photo by Max Ovcharenko on Unsplash
Quiz
Recall Jacob's reason to start learning guitar (to play at camp next summer). Which playing position(s) is/are best for him to learn while playing guitar? Select all that apply.
Step 2: Tuning the Guitar
Each string on your guitar is an individual note with its own name. Let's look specifically at the names of the strings to help you with tuning.
Use the saying "Elephants And Donkeys Grow Big Ears" to help remember the order. You can make up any mnemonic device to help you remember! Another commonly used one is "Eddie Ate Dynamite, Goodbye Eddie".
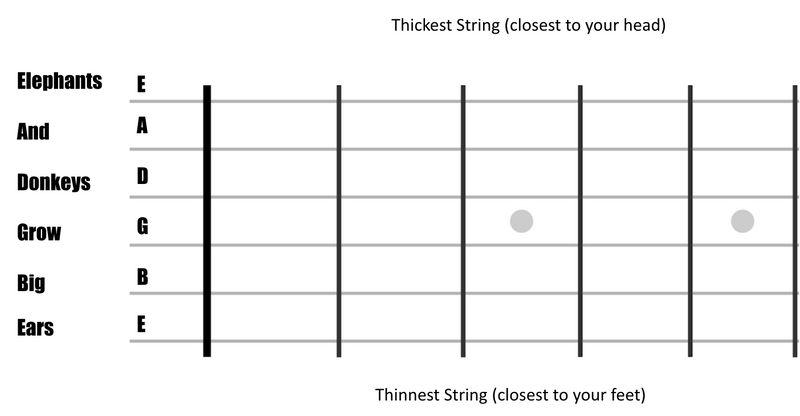 The strings will sound the deepest the closest to your head (starting with low E — Elephants) and the highest the closest to your feet (ending with high E — Ears).
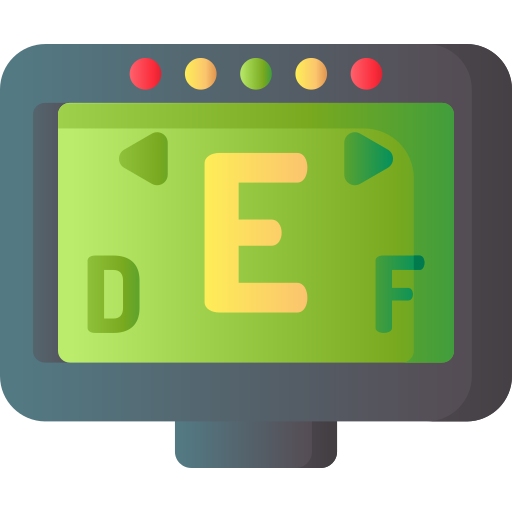
 Using a tuner, you need to individually pluck each string and turn the tuning peg to get your guitar tuned. Watch your tuner turn green to know that the string is in tune!
 Alternatively, you can use your ear to tune. When your guitar matches the sounds being played, you're in tune.
Check out the video below for a tuning tutorial:
Did you know?
Step 3: How to Read a Guitar Chord Diagram
A chord is a musical term to describe when 3 or more notes are played at the same time. Typical pop songs will only contain about 4 different chords played in repetition.
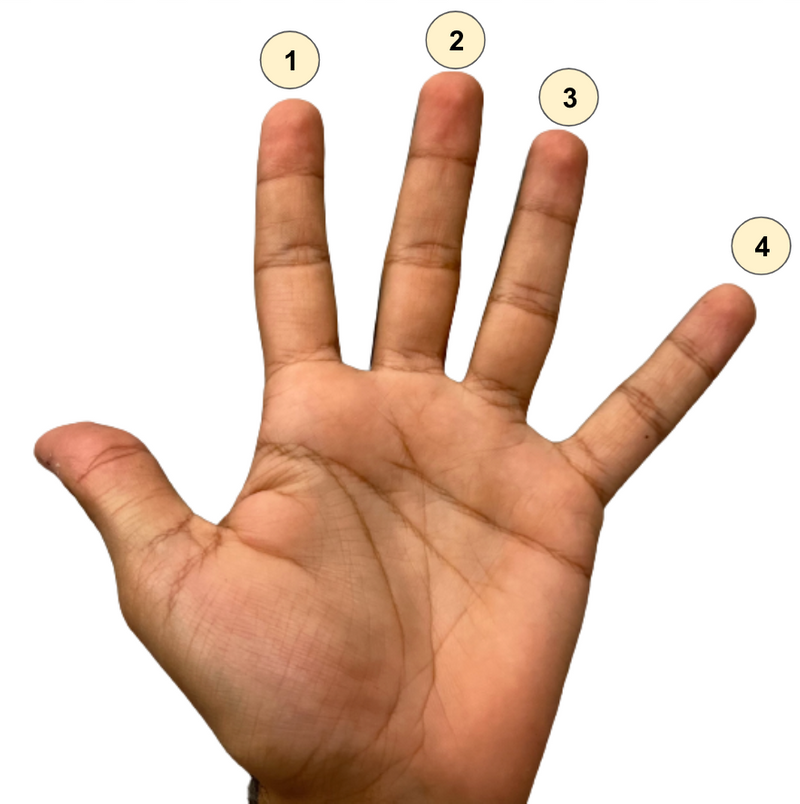
To read a guitar chord diagram, it's important to know how to label your left-hand fingers. If you've played piano before, this is VERY similar!

In piano, you begin labeling your fingers with your thumb as number 1. But since we don't use our thumb as much when playing the guitar, we begin labelling with our pointer finger as number 1.
What does your right hand do?
Strum = your right hand will quickly graze the strings over the tone hole.

This is typically done with a guitar pick but can also be done with your thumb and fingers.
How to read a chord diagram:
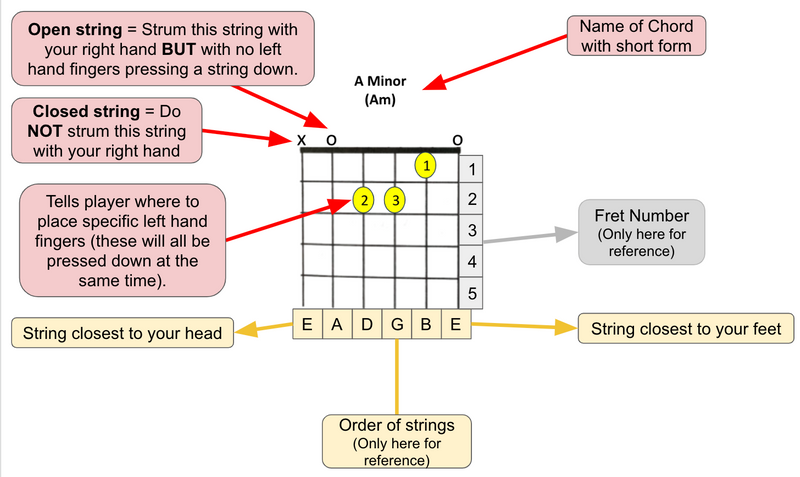
Click the play button on the audio player below to hear a description of the diagram above.
Subscribe for more quick bites of learning delivered to your inbox.
Unsubscribe anytime. No spam. 🙂
Step 4: Your First 6 Chords
Have a look at some of the most common chords you'll play. Once you feel comfortable playing each chord individually, you can begin moving from one chord to the next. See the "Take Action" section for links to play along songs.
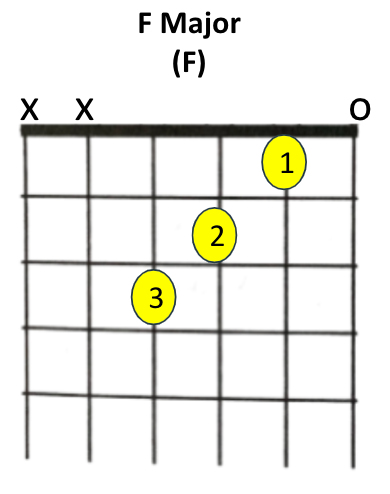 Note: This is a simpler way to play F major. Check here for more ways to play.
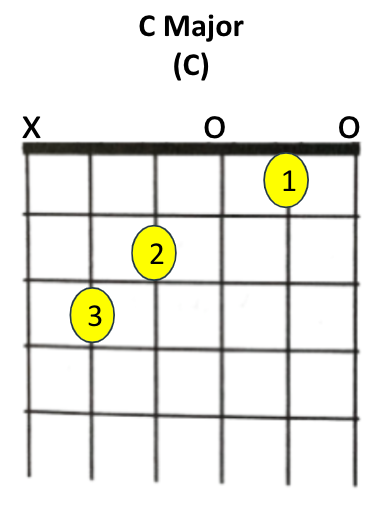 Click here for a video demonstration of the C major chord.
 Click here for a video demonstration of the A minor chord.
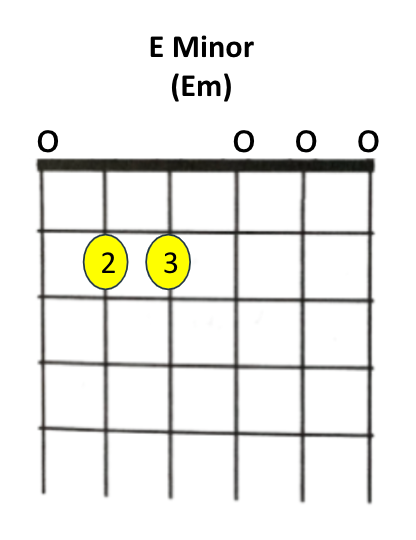 Click here for a video demonstration of the E minor chord.
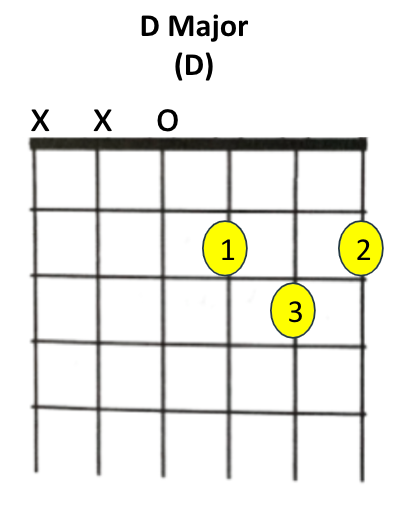 Click here for a video demonstration of the D major chord.
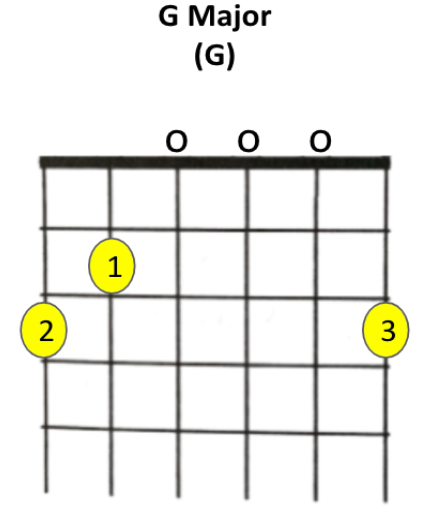 Note: This is a simpler way to play G major. Check here for more ways to play.
How to Learn Guitar Chords: Helpful Tips
Don't be discouraged if you have difficulties at first! That's common. Beginner guitar players like you can use these tips to play better and faster.

Tune your strings. If even 1 string is out of tune, the whole chord will sound wrong.
Place your fingers slightly behind the fret rod that's closest to the guitar's body (see the image below for example). Fingers directly on the fret will mute the sound while fingers too far from the fret will create a buzz or unclear sound.
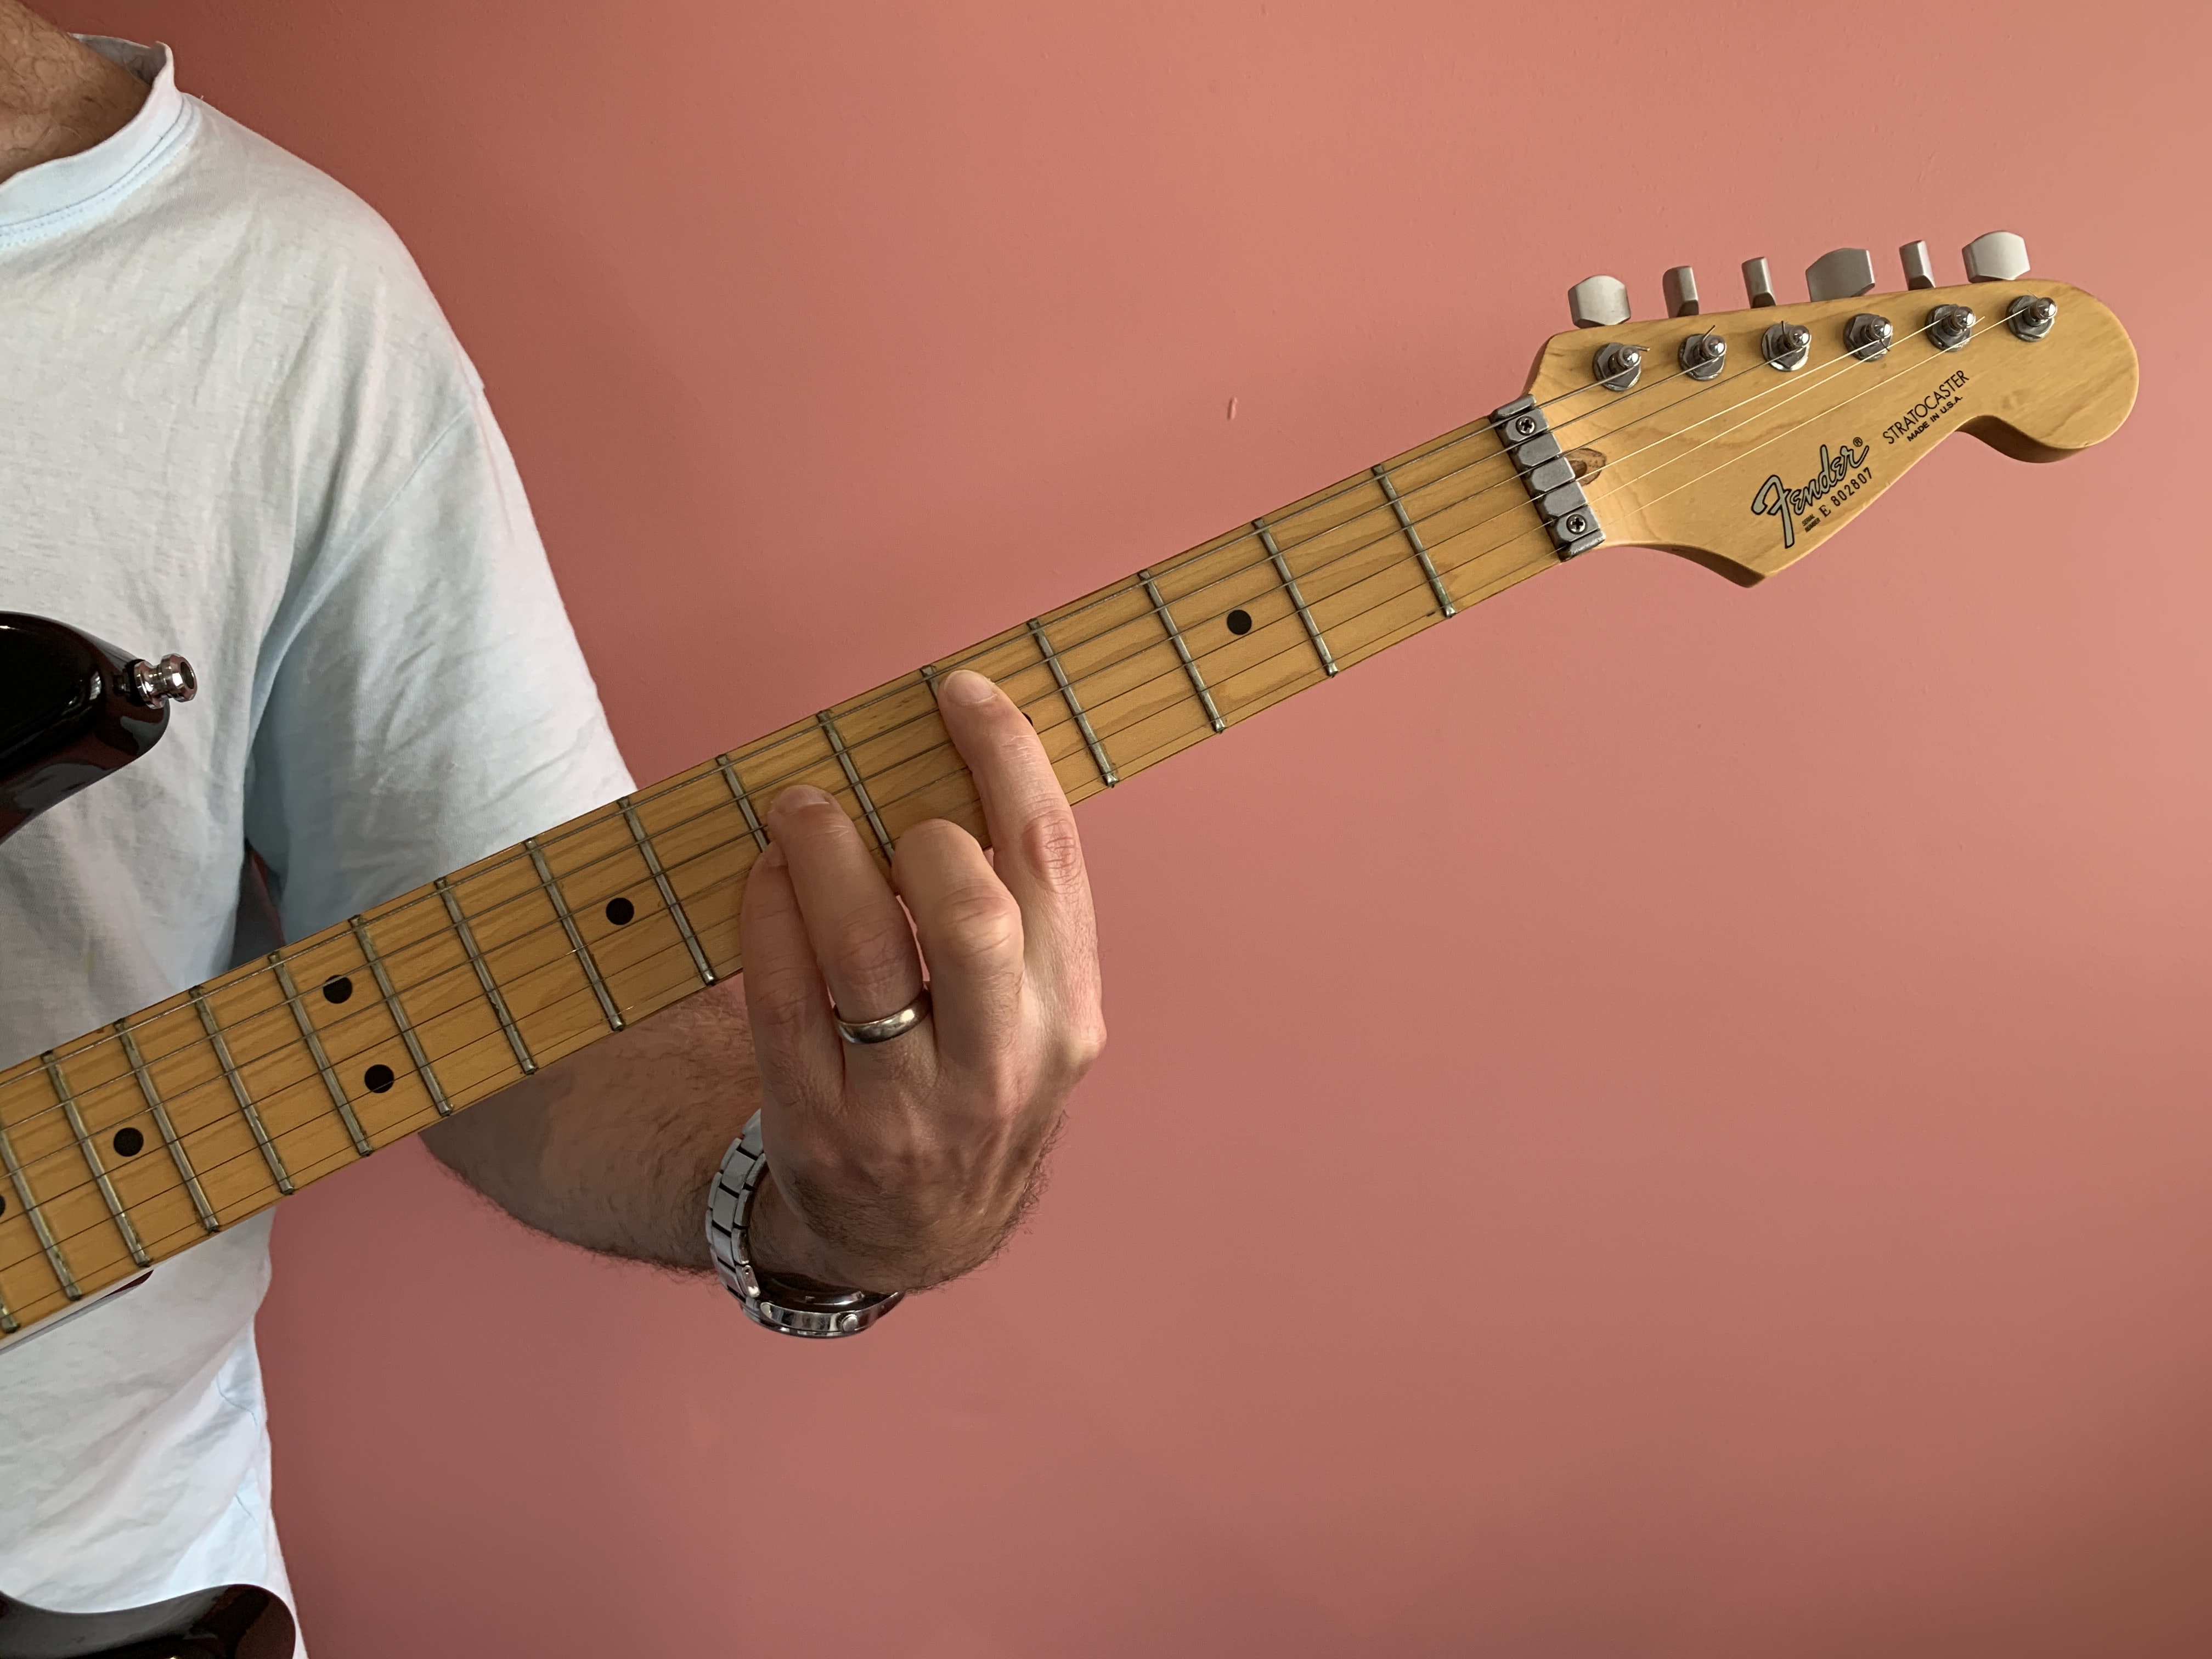 Photo by Paulo Goncalves on Unsplash
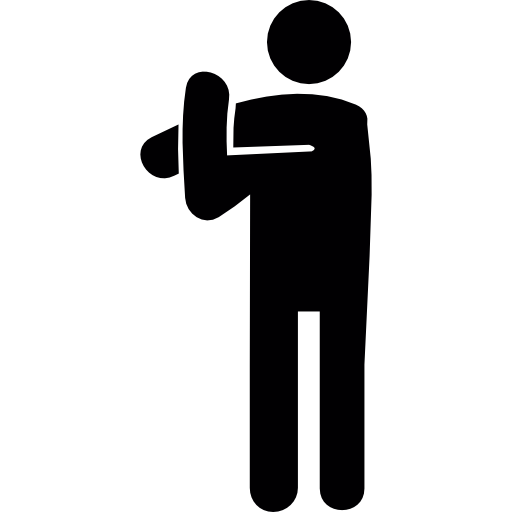
Stretch your fingers before and after playing. This will enhance flexibility as you continue to learn more complex chords and can also help prevent playing-related injuries in the future.
Take Action
Wondered how to learn guitar chords? It's time to apply your learning and make some music!

Your feedback matters to us.
This Byte helped me better understand the topic.