
Have you ever struggled to make science fun and engaging for kids?
Did you find science boring when you were in school? Would you like to make it more interesting for your learners?
Every science teacher knows these challenges well. It's time to change the narrative!

Discover three hands-on science experiments for kids that will fascinate young minds and demonstrate the exciting world of natural science.
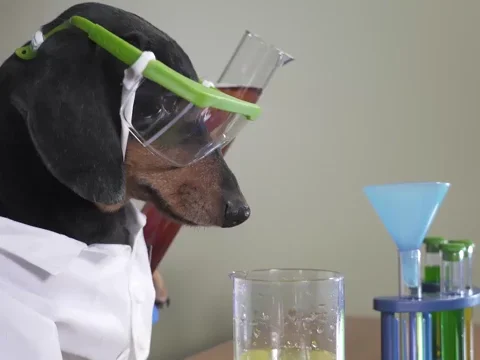
Get ready to unleash creativity and curiosity for science topics in ANY youngster —guided by Ms. Thompson, an experienced science teacher with a focus on fun, who will spark reactions like the one above.
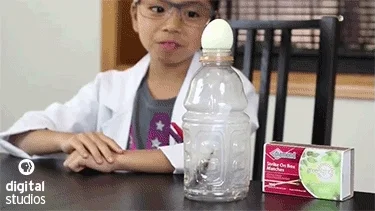
Experiment 1: Egg in a Bottle
First, Ms. Thompson captivates her students with the classic egg in a bottle experiment, demonstrating the effects of air pressure in a fun and engaging way.

Using simple ingredients, they explore how the egg gets sucked into the bottle.

You'll need:
Hard-boiled egg
Glass bottle with an opening slightly smaller than the diameter of the egg
Matches
Strips of paper

How to proceed:
Peel the hard-boiled egg.
Light a strip of paper on fire and drop it into the bottle.
Quickly place the egg on the bottle's mouth.
Watch as the egg gets sucked into the bottle when the flame goes out.
Note: Ms. Thompson shows her students how to practice proper fire safety when handling matches. She also checks in with her school's principal first to make sure the experiment doesn't violate any school safety rules.
Experiment 2: Build a Solar-Powered Car
Next, Ms. Thompson helps her students build a model solar-powered car.
This experiment introduces them to the principles of solar cells and the basics of engineering.
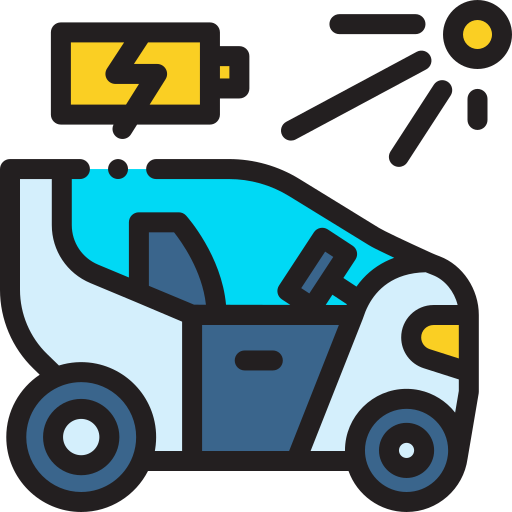
By harnessing the power of the sun, kids can learn about renewable energy sources and explore the principles of physics.


You'll need:
Small solar panel
DC motor
Wheels
Axles
Gears
Soldering iron & kit
Safety goggles
Recyclable materials for the
chassis
How to proceed:

Safety first! Before beginning, Ms. Thompson demonstrates the safe use of a soldering iron, emphasizing that it can get extremely hot. She shows how to hold the iron and reminds everyone to wear safety goggles during this step. She also makes sure they're in a well-ventilated space to avoid inhaling soldering fumes.
Build the chassis: Construct a simple frame from your lightweight materials.
Install the motor: Secure the DC motor to the chassis using glue or tape.
Attach the gears (optional): If using gears, attach them to the motor’s output shaft.
Set up the axles and wheels: Attach the axles to the chassis and fix the wheels on both ends.
Mount the solar panel: Secure the solar panel on top of the chassis where it can receive maximum sunlight. Angle it if necessary.
Wire the system: Using the soldering kit, connect the solar panel to the DC motor with electrical wires.
Test and troubleshoot: Place the car in sunlight to test. Observe the movement and make any necessary adjustments.
Have a look at this cool video to show you all of the steps in detail:
Did you know?
Experiment 3: Conduct a Water Density Experiment
The week wraps up with a water density experiment, where Ms. Thompson guides her students through creating colorful layers of different liquids.

This project allows kids to explore the concept of density by creating colorful layers using different liquids.
It's a fantastic opportunity to learn about properties of matter while having a blast.

You'll need:
Honey
Dish soap
Water
Food coloring
Vegetable oil
Tall, clear glass or jar

How to proceed:
Pour each liquid into the glass, respecting their density order (honey, dish soap, colored water, vegetable oil).
Discuss (each liquid settles into its own layer due to differences in density) and observe how they layer due to varying densities (denser liquids sink and less dense liquids rise).
Quiz
After their experiment, Ms. Thompson challenges the class with a question about the observed liquid densities. Which liquid is the densest?
Did you know?
Subscribe for more quick bites of learning delivered to your inbox.
Unsubscribe anytime. No spam. 🙂
Take Action
Ready to spark a love of science in young minds? Turn ordinary days into thrilling science explorations!

By engaging in these fun science experiments for kids, your students can develop a love for science while enhancing their critical thinking and problem-solving skills.

Embark on the adventure of hands-on learning, and let the young scientists in your life thrive!
Your feedback matters to us.
This Byte helped me better understand the topic.