Microscopes are like...cars?
Have you ever noticed that when multiple drivers use one car each person has to adjust the seat, side mirrors, steering wheel and radio before driving the car?

In the lab, students and techs face a similar situation with their microscopes. They need to regularly adjust microscopes due to having different users, different kinds of slides, or a new perspective on a worked sample. Anyone working or giving presentations with microscopes needs a simple method to line up and illuminate their targets.
Enter Koehler illumination, a quick method for setting up your optical microscope that is essential to daily work in the lab.
Koehler Illumination Changes the Game
 Image courtesy of Wikimedia Commons
A well-tuned microscope provides the right amount of light at the right place, but it wasn’t always so simple.
Meet August Koehler
Back in the day August Koehler, the method’s namesake, wanted crisp images of his samples, but there was a problem.
Techniques of the day often resulted in an image of the light source in the same plane as the sample.
However, solutions to this problem often produced uneven light!

Working the Problem
Koehler needed a way to defocus the light source so that it lit up the sample consistently but was not itself visible.

He figured it out and gave the world Koehler illumination. He was a graduate student at the time.
The Koehler Illumination Method
Which Parts of the Microscope Will I Be Using?
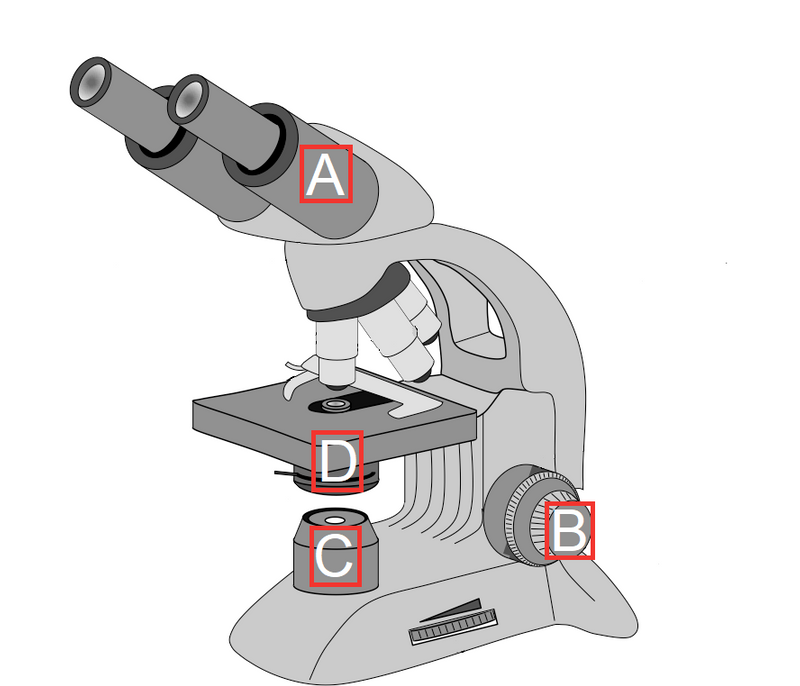 Image adapted from Wikimedia Commons
A. Eyepiece
B. Coarse and fine adjustment knobs
C. Light source diaphragm (often called “field diaphragm” or “illuminator diaphragm”)
D. Condenser, condenser screws, and condenser diaphragm
How Do I Do the Method?
Focus your sample
Close your field diaphragm to a sharp circle
Center the circle in your field of view
Work the condenser for final adjustments
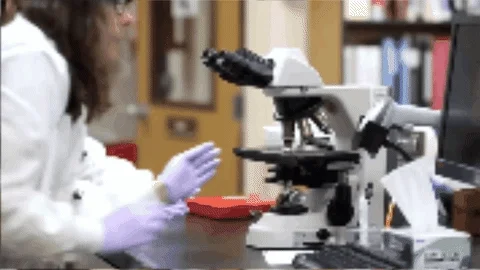
Let's break this method down further, shall we?
First Steps
Step 1: Focus Your Image
For this initial step, you're just making sure your sample is generally visible, and that you’re on the right viewing plane.
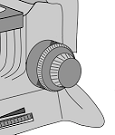 The coarse and fine adjustment knob
To unblur your sample, move the coarse focus first, which moves the stage. Next, go to the fine adjustment to do further unblurring.
Images adapted from Wikimedia Commons
Step 2: Close Down the Field Diaphragm into a Sharp Circle
Find the field diaphragm on your light source (or “illuminator”), probably on the base of your microscope.
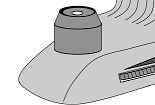 The field diaphragm is located on your illuminator
The diaphragm on this and other parts is like a little spaceship door that opens and closes to control light flow.

Look into your eyepiece and move the field diaphragm lever on the light source. See how it opens and closes your field of view up into a circle (or hexagon) shape?
 Image adapted from Wikimedia Commons
You want to unblur the edges of this shape. If they're blurry, move your condenser knob til the edges have a nice crisp look.
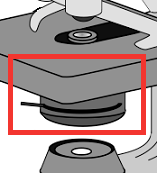 Condenser
 Image adapted from Wikimedia Commons
Go on to the final steps.
Final Steps
Step 3: Center the Circle
Looking through the eyepiece, you’ll likely notice that the circle- or hexagon-shaped light is off center. To get your field of view centered again, you need to locate your condenser screws. They look a little like Frankenstein’s neck bolts.

Twirl the screws to move your circle (or hexagon) to the center of your field of view. Before going to the next step, slowly open your field diaphragm back up so that the black edges are just barely outside your field of view. At this point, you should have perfectly centered and diffuse light.
 Three images that show a centered field diaphragm slowly opening
Step 4: Work the Condenser for Final Adjustments
Finally, use your condenser diaphragm lever to fine-tune your sample's resolution and contrast. Here, you might think of resolution and contrast as two ends of a spectrum. You want to maximize detail while also making sure your colors don’t get too muddy.

Voila! The perfect image.
Scenario: Microscope Goes Dark

Suppose when you close the field diaphragm your entire field of view turns black. It looks like your condenser is way off center, so you can't really see any light at all! What can you do to fix it?
A. Turn the microscope on and off, then swap to a new objective lens
B. Close down the field diaphragm only part way, then center it better with the condenser screws
C. Move the coarse adjustment on the stage, then move to fine adjustments
Quiz
Select the right way to fix the microscope view:
Take Action
So: have you adjusted your microscope today?

"Be a lot Koehler if you did!"
Your feedback matters to us.
This Byte helped me better understand the topic.

